Have you ever noticed how cluttered and confusing WooCommerce category pages can be? I certainly have, as have your customers if you run a webshop.
The default setup often displays subcategories identical to product cards, creating a confusing user experience.
Today, I’m going to walk you through a solution I’ve developed to tackle this problem head-on.
The Problem: Poor UX in WooCommerce Category Pages
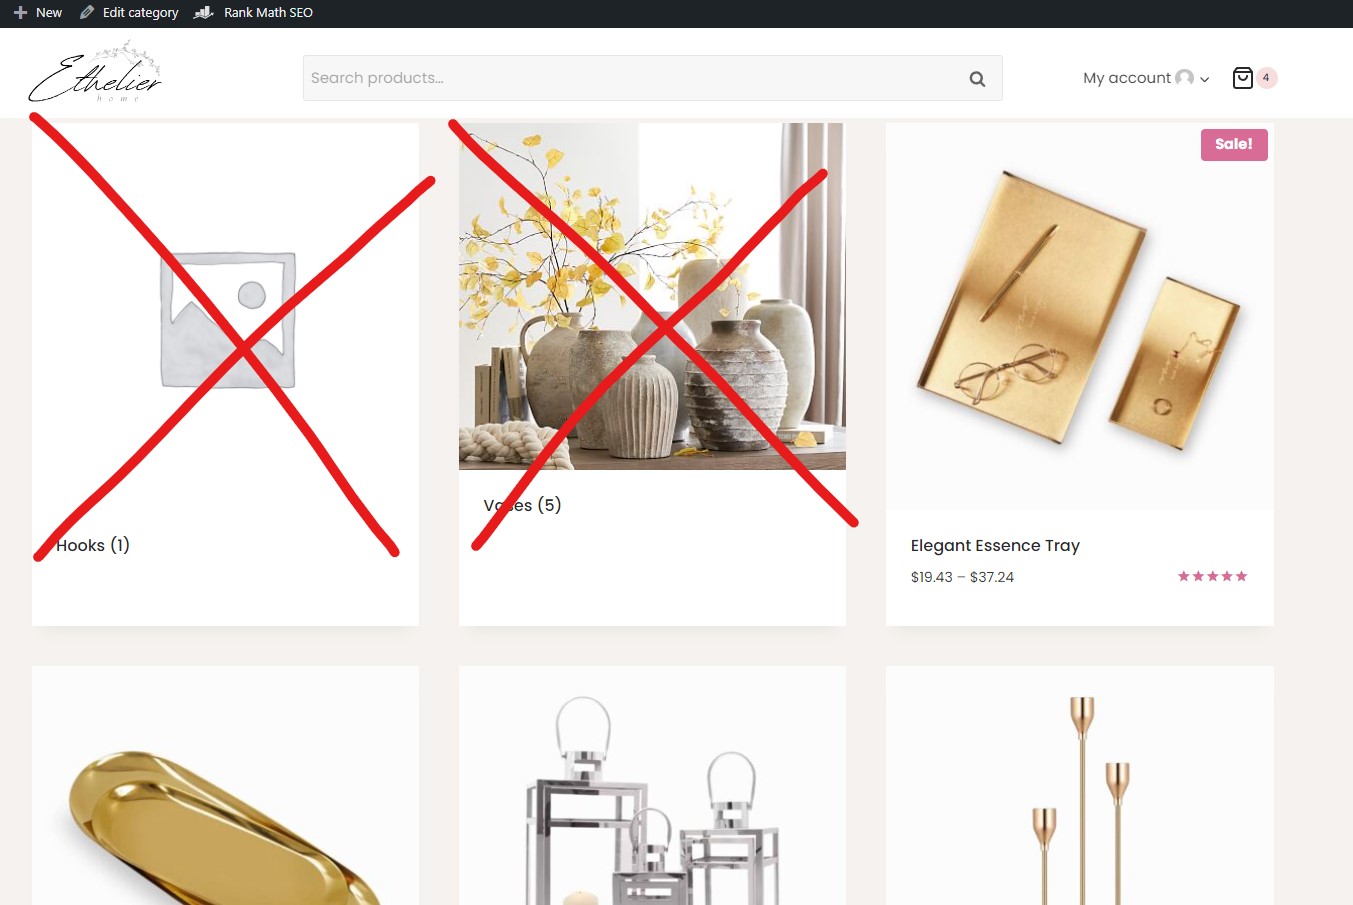
By default, WooCommerce doesn’t differentiate between subcategories and products on category archive pages.
This leads to a cluttered interface where users struggle to distinguish between navigation options (subcategories) and actual products.
It’s a classic case of poor user experience (UX) that can frustrate shoppers and potentially impact your conversion rates.
The Solution: Custom Subcategory Display

To address this, I’ve created a custom solution that clearly separates subcategories from products.
My approach involves adding button-like subcategory links that incorporate the featured image of each subcategory.
This creates a visually distinct navigation element that stands out from the product listings.
Let’s dive into the code and see how it works.
PHP Code to Add Subcategory Links
Here’s the PHP code that makes the magic happen:
function display_subcategories_after_description() {
    if (is_product_category()) {
        $term = get_queried_object();
        $args = array(
            'child_of' => $term->term_id,
            'taxonomy' => 'product_cat',
            'hide_empty' => false,
        );
        $subcategories = get_terms($args);

        if ($subcategories) {
            echo '<div class="subcategory-list">';
            foreach ($subcategories as $subcategory) {
                $thumbnail_id = get_term_meta($subcategory->term_id, 'thumbnail_id', true);
                $image_url = wp_get_attachment_url($thumbnail_id);

                echo '<a href="' . get_term_link($subcategory) . '" class="subcategory-item" style="background-image: url(' . esc_url($image_url) . ');">';
                echo '<div>' . $subcategory->name . '</div>';
                echo '</a>';
            }
            echo '</div>';
        }
    }
}
add_action('woocommerce_before_shop_loop', 'display_subcategories_after_description');
This function, display_subcategories_after_description(), does several key things using standard Woocommerce and WP functions:
- It checks if we’re on a product category page using
is_product_category(). - It retrieves all subcategories of the current category using
get_terms(). - For each subcategory, it fetches the featured image and creates a link with the subcategory name.
- The subcategory links are wrapped in a div with the class
subcategory-list.
The function is hooked into the woocommerce_before_shop_loop action, which places our subcategory list before the main product loop.
The CSS: Styling Our Subcategory Links
Now, let’s look at the CSS that styles our subcategory links:
.subcategory-list {
    display: flex;
    flex-wrap: wrap;
    justify-content: center;
    margin: 20px 0;
}

.subcategory-item {
    flex: 1 0 22%;
    max-width: 22%;
    box-sizing: border-box;
    margin: 10px;
    background-color: var(--global-palette9);
    padding: 20px;
    text-align: center;
    border-radius: 0;
    transition: background-color 0.3s ease, opacity 0.3s ease;
    color: var(--global-palette9);
    font-weight: bold;
    display: flex;
    align-items: center;
    justify-content: center;
    background-size: cover;
    background-position: center;
    position: relative;
    text-decoration: none;
}

.subcategory-item div {
    position: relative;
    color: var(--global-palette9);
    font-weight: bold;
}

.subcategory-item::before {
    content: '';
    position: absolute;
    top: 0;
    left: 0;
    right: 0;
    bottom: 0;
    background-color: rgba(92, 92, 92, 0.4);
    transition: background-color 0.3s ease;
}

.subcategory-item:hover::before {
    background-color: rgba(92, 92, 92, 1);
}

@media (max-width: 768px) {
    .subcategory-list {
        display: grid;
        grid-template-columns: repeat(2, 1fr);
        gap: 10px;
    }

    .subcategory-item {
        flex: none;
        max-width: 100%;
        padding: 10px;
        font-size: 14px;
    }
}
Here’s what this CSS does:
- The
.subcategory-listuses flexbox to create a responsive, centered layout. - Each
.subcategory-itemis styled as a flex item, taking up 22% of the container width, meaning it will have 5 columns per row. - We use
background-size: coverandbackground-position: centerto properly display the subcategory’s featured image. - A semi-transparent overlay is added using the
::beforepseudo-element, which darkens on hover for a nice interactive effect. - Media queries ensure the layout remains attractive on mobile devices, switching to a two-column grid.
Customization Options
This solution is highly customizable. Here are some ways you can tweak it:
- Colors: The
var(--global-palette9)references are from the Kadence theme. You can replace these with your own color codes or theme color variables. - Sizes: Adjust the
flexandmax-widthproperties of.subcategory-itemto change their size and layout. - Spacing: Modify the
marginandpaddingvalues to adjust spacing between and within the subcategory items. - Overlay: Change the
background-colorof the::beforepseudo-element to adjust the overlay color and opacity. - Typography: Adjust the
font-weightandfont-sizeproperties to change the text appearance. - Columns: Adjust the 22% flex box width to get less or more columns.
Pro Tip: Non-Image Version
In the PHP code, you’ll notice a commented-out line:
//echo '<a href="' . get_term_link($subcategory) . '" class="subcategory-item">';If you uncomment this line and comment out the line using the background image, you’ll get a version of the subcategory links without images.
This can be useful if you prefer a simpler, text-only design or if some of your subcategories don’t have featured images. Sometimes less is more.
With this solution, we’ve transformed the WooCommerce category pages from a confusing mess into a clear, navigable interface. Users can now easily distinguish between subcategories and products, improving the overall shopping experience.